Installing Single Node OpenShift on Bare Metal
Note: This is part of a series. Make sure you started here: Building a Portable Kubernetes Home Lab with OpenShift - OKD4
We’re going to install an OpenShift OKD SNO cluster on a bare metal server. The bootstrap node will run on your workstation. This particular tutorial is biased towards a MacBook workstation. However, you can easily modify this to run the bootstrap node on Fedora or other Linux flavor.
There is also a feature for installing SNO with “bootstrap-in-place” which does not require a bootstrap node. It is not quite ready for our purposes yet, so we’re still going to use a bootstrap node to initiate the install.
Look for a future post with Bootstrap In Place.
-
Install some tools on your workstation:
brew install qemu autoconf automake wolfssl
Set Up a MacBook for Qemu with Bridged Network
Set Up Your Workstation for Bootstrap
-
Now, we need to set up our MacBook to run the bootstrap node:
-
Plug in your USB-C network adapter and identify the device:
-
Run this to list all of your devices:
networksetup -listallhardwareports -
Look for the USB entry:
Mine looked like this:
Hardware Port: USB 10/100/1G/2.5G LAN Device: en6 Ethernet Address: 00:e0:4c:84:ca:aa -
Note the
Devicename, and set a variable:BOOTSTRAP_BRIDGE=en6 -
Add this device to your lab configuration:
yq e ".bootstrap.bridge-dev = \"${BOOTSTRAP_BRIDGE}\"" -i ${OKD_LAB_PATH}/lab-config/dev-cluster.yamlYou should see an entry in
${OKD_LAB_PATH}/lab-config/dev-cluster.yamlfor the bridge-dev now:... butane-spec-version: 1.3.0 release: ${OKD_VERSION} bootstrap: metal: true mac-addr: "52:54:00:a1:b2:c3" boot-dev: sda ... bridge-dev: en6 ...
-
-
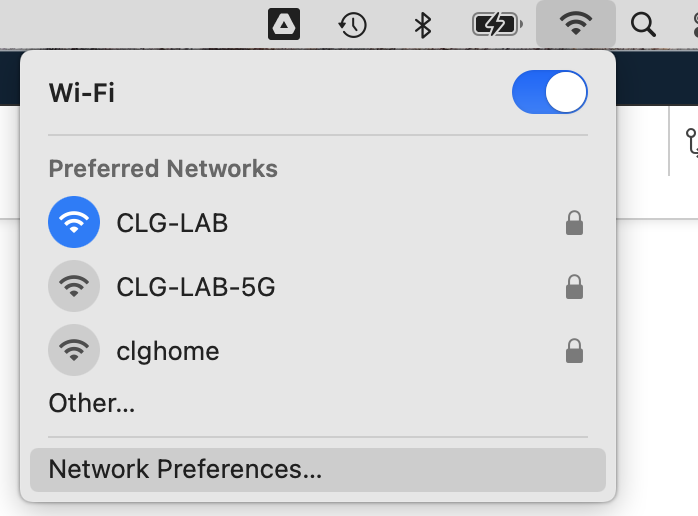
Set your WiFi to be the primary internet link:
-
Click on the wifi icon in the top right of your screen.
-
In the bottom left of the pop up, select the menu dropdown and click on
Set Service Order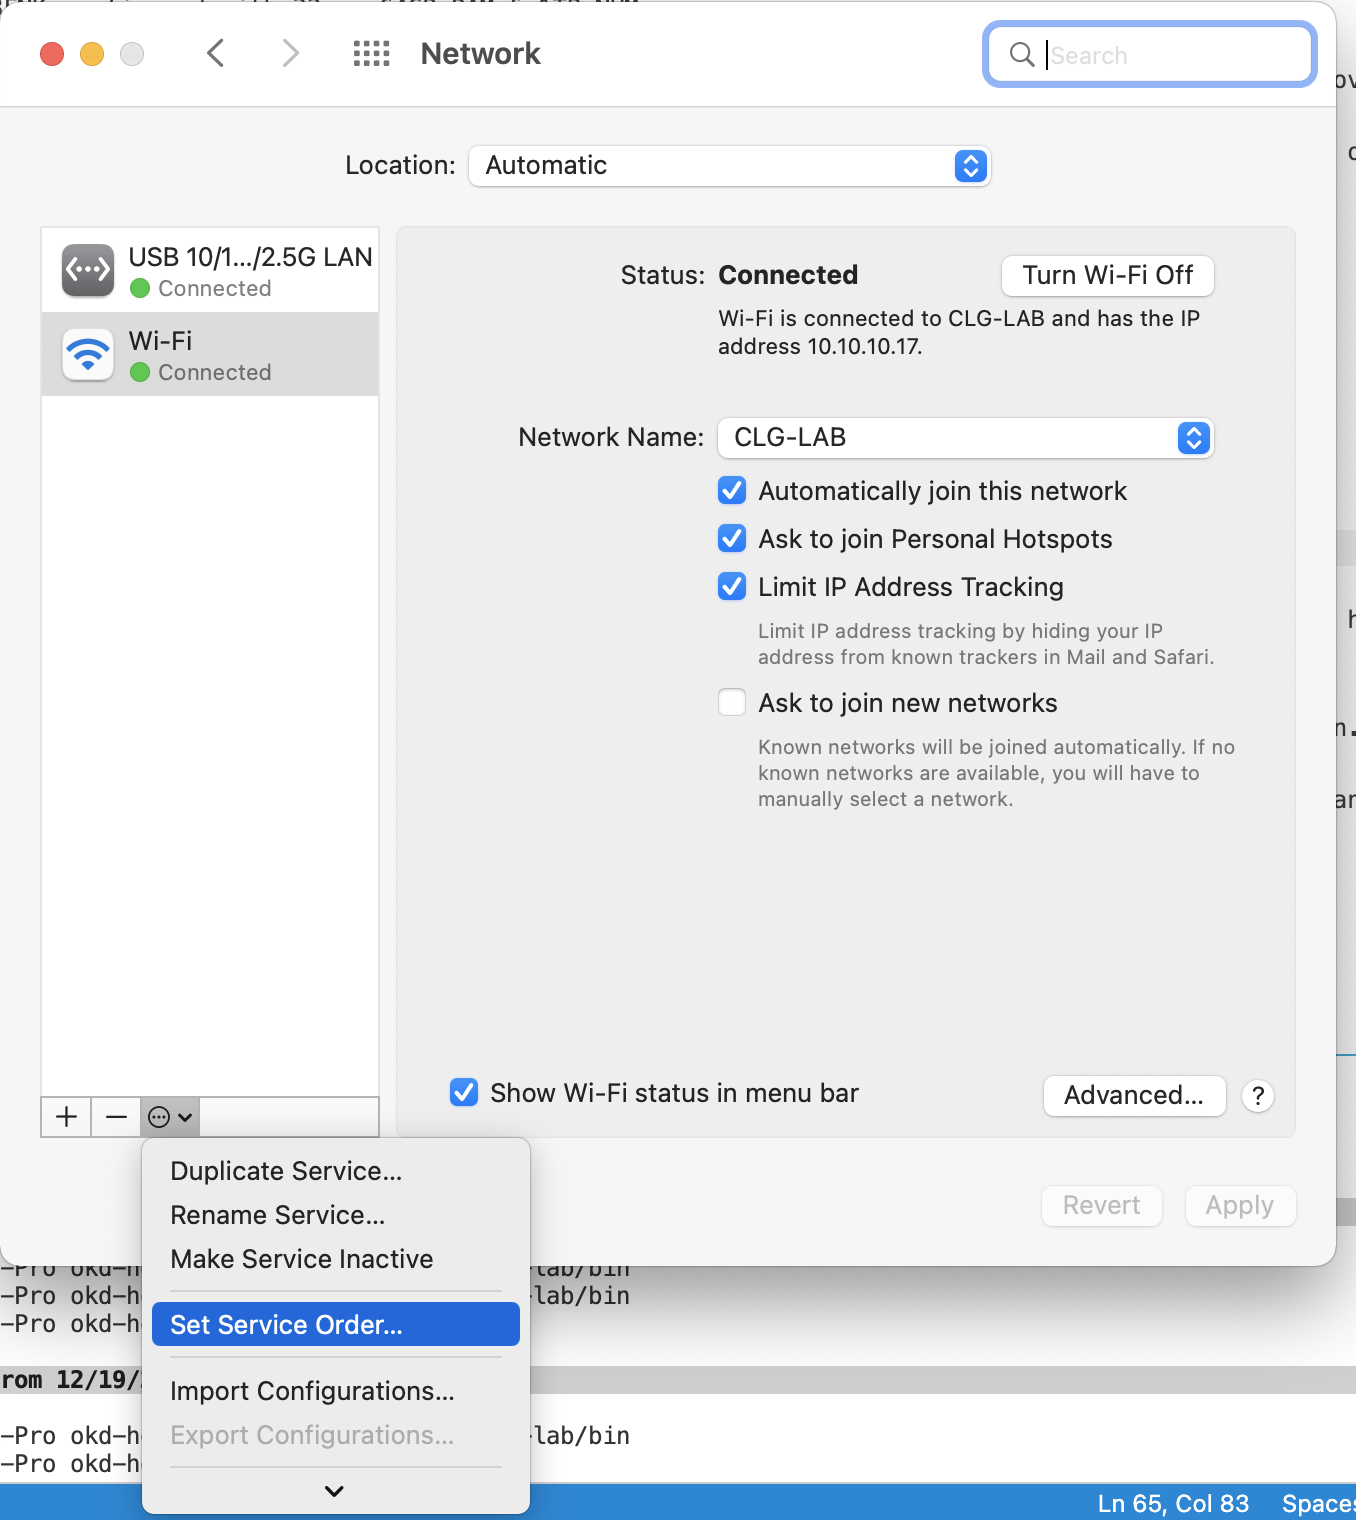
-
Drag
WiFito the top.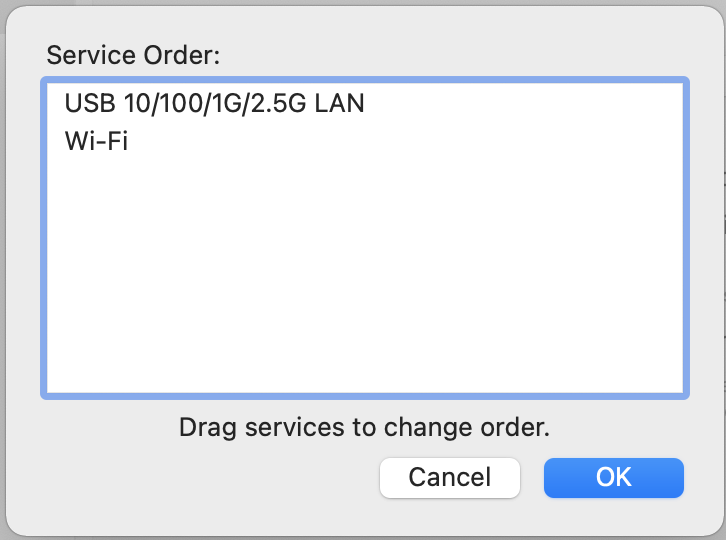
-
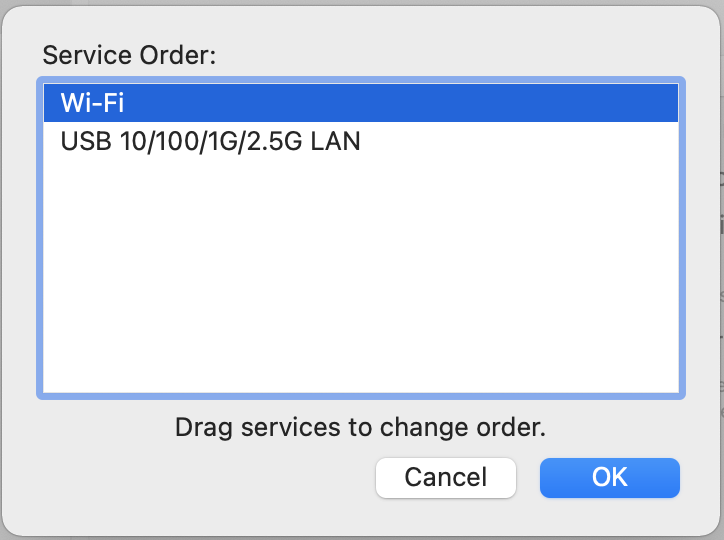
Click
OKthen clickApply
-
-
Now, install VDE for bridged networking:
mkdir -p ${OKD_LAB_PATH}/work-dir cd ${OKD_LAB_PATH}/work-dir git clone https://github.com/virtualsquare/vde-2.git cd vde-2 autoreconf -fis ./configure --prefix=/opt/vde make sudo make install -
Finally, set up the network bridge device:
cd ${OKD_LAB_PATH}/work-dir
git clone https://github.com/lima-vm/vde_vmnet
cd vde_vmnet
make PREFIX=/opt/vde
sudo make PREFIX=/opt/vde install
sudo make install BRIDGED=${BOOTSTRAP_BRIDGE}
Preparing for the Installation
Since we are simulating a secure data center environment, let’s deny internet access to our internal network:
-
Select the Lab subdomain that you want to work with:
There is a function that we added to our shell when we set up the workstation. It allows you to switch between different lab domain contexts so that you can run multiple clusters with potentially different releases of OpenShift.
labctx dev -
Add a firewall rule to block internet bound traffic from the internal router:
labcli --disconnect
Create the OpenShift install manifests, Fedora CoreOS ignition files, and the iPXE boot files
-
Create the manifests and Node installation files:
labcli --deploy -cThis script does a whole lot of work for us. Crack it open and take a look.
- Creates the OpenShift install-config.yaml
- Invokes the openshift-install command against our install-config to produce ignition files
- Uses
butaneto modify the ignition files to configure each node’s network settings - Copies the ignition files into place for Fedora CoreOS
- Creates iPXE boot files for each node and copies them to the iPXE server, (your router)
We are now ready to fire up our OpenShift cluster
-
Start the bootstrap node on your workstation:
In a separate terminal window, run the following:
labcli --start -b- Do not close this terminal. It is the console of the bootstrap node.
- Do not power on your control plane nodes until the bootstrap Kubernetes API is available.
-
Monitor the bootstrap process:
In a terminal window, run the following:
openshift-install --dir=${INSTALL_DIR} wait-for bootstrap-complete --log-level debugNote: This command does not affect to install process. You can stop and restart it safely. It is just for monitoring the bootstrap.
-
When the API is available, power on your control plane NUC:
You will see the following output from the above command:
NOTE: If you are on a 13” MacBook Pro like me, this will take a while. Be patient.
INFO API v1.20.0-1085+01c9f3f43ffcf0-dirty up
INFO Waiting up to 30m0s for bootstrapping to complete...
Now, power on your NUC to start the cluster installation.
If you want to watch bootstrap logs:
In yet another terminal…
ssh core@okd4-bootstrap.${SUB_DOMAIN}.${LAB_DOMAIN} "journalctl -b -f -u release-image.service -u bootkube.service"Or, to monitor the logs from the node:
ssh core@okd4-snc-node.${SUB_DOMAIN}.${LAB_DOMAIN} "journalctl -b -f -u release-image.service -u bootkube.service" -
Enable Hyper-Threading on the OpenShift node:
By default, Fedora CoreOS will disable SMT on processors which are vulnerable to side channel attacks. Since we are on a private cloud, we are less concerned about that, and could really use those extra CPUs.
So, let’s enable SMT.
-
Make sure that all of the OpenShift node is up and installing:
ssh core@okd4-snc-node.${SUB_DOMAIN}.${LAB_DOMAIN} "echo Running" -
Modify the kernel arguments to enable SMT on the next boot:
ssh core@okd4-snc-node.${SUB_DOMAIN}.${LAB_DOMAIN} "sudo rpm-ostree kargs --replace=\"mitigations=auto,nosmt=auto\""
-
-
Now, wait patiently for the bootstrap process to complete:
You will see the following, when the bootstrap is complete:
INFO Waiting up to 20m0s for the Kubernetes API at https://api.okd4-snc.dev.my.awesome.lab:6443... DEBUG Still waiting for the Kubernetes API: an error on the server ("") has prevented the request from succeeding INFO API v1.20.0-1085+01c9f3f43ffcf0-dirty up INFO Waiting up to 30m0s for bootstrapping to complete... DEBUG Bootstrap status: complete INFO It is now safe to remove the bootstrap resources DEBUG Time elapsed per stage: DEBUG Bootstrap Complete: 11m16s DEBUG API: 3m5s INFO Time elapsed: 11m16s -
When the bootstrap process is complete, remove the bootstrap node:
labcli --destroy -bThis script shuts down and then deletes the Bootstrap VM. Then it removes the bootstrap entries from the HA Proxy configuration.
-
Monitor the installation process:
openshift-install --dir=${INSTALL_DIR} wait-for install-complete --log-level debug -
Fix for a stuck MCO
In some recent versions of OKD, the Machine Config Operator cannot complete the installation because it is looking for a non-existent machine config.
See: https://github.com/openshift/okd/issues/963
export KUBECONFIG=${KUBE_INIT_CONFIG}
oc delete mc 99-master-okd-extensions 99-okd-master-disable-mitigations
This will force a recreation of the control plane machine configs, and will allow the install to complete.
-
Installation Complete:
DEBUG Cluster is initialized
INFO Waiting up to 10m0s for the openshift-console route to be created...
DEBUG Route found in openshift-console namespace: console
DEBUG OpenShift console route is admitted
INFO Install complete!
INFO To access the cluster as the system:admin user when using 'oc', run 'export KUBECONFIG=/Users/yourhome/okd-lab/okd-install-dir/auth/kubeconfig'
INFO Access the OpenShift web-console here: https://console-openshift-console.apps.okd4-snc.dev.my.awesome.lab
INFO Login to the console with user: "kubeadmin", and password: "AhnsQ-CGRqg-gHu2h-rYZw3"
DEBUG Time elapsed per stage:
DEBUG Cluster Operators: 13m49s
INFO Time elapsed: 13m49s
Our install is nearly complete. We just have a few more tasks.
-
Create an empty volume for the internal registry:
export KUBECONFIG=${KUBE_INIT_CONFIG} oc patch configs.imageregistry.operator.openshift.io cluster --type merge --patch '{"spec":{"managementState":"Managed","storage":{"emptyDir":{}}}}' -
Create an Image Pruner:
oc patch imagepruners.imageregistry.operator.openshift.io/cluster --type merge -p '{"spec":{"schedule":"0 0 * * *","suspend":false,"keepTagRevisions":3,"keepYoungerThan":60,"resources":{},"affinity":{},"nodeSelector":{},"tolerations":[],"startingDeadlineSeconds":60,"successfulJobsHistoryLimit":3,"failedJobsHistoryLimit":3}}' -
Delete all of the Completed pods:
oc delete pod --field-selector=status.phase==Succeeded --all-namespaces -
Because our install is disconnected from the internet, we need to remove the cluster update channel, Samples Operator, and OperatorHub:
oc patch ClusterVersion version --type merge -p '{"spec":{"channel":""}}' oc patch configs.samples.operator.openshift.io cluster --type merge --patch '{"spec":{"managementState":"Removed"}}' oc patch OperatorHub cluster --type json -p '[{"op": "add", "path": "/spec/sources/0/disabled", "value": true}]' -
Note:
If you ever forget the password for your cluster admin account, you can access your cluster with the
kubeadmintoken that we saved in the file:${OKD_LAB_PATH}/lab-config/okd4-snc.${SUB_DOMAIN}.${LAB_DOMAIN}/kubeconfiglabctx dev export KUBECONFIG=${KUBE_INIT_CONFIG}
Log into your new cluster console
-
Add the OKD Cluster cert to the trust store on your workstation:
labcli --trust
Create user accounts:
Let’s add some users to the cluster that we created. The temporary kubeadmin account is not a useful long term strategy for access to your cluster. So, we’re going to add a couple of user accounts.
OpenShift supports multiple authentication methods, from enterprise SSO to very basic auth. We’re going to start with something a little basic, using htpasswd.
-
If you don’t already have it available, install
htpasswdon your workstation. -
Create an
htpasswdfile for a couple of users:labcli --user -i -a -u=admin labcli --user -u=devuser -
Wait a couple of minutes for the Authentication pods to restart and stabalize.
-
Now you can verify that the new user account works:
labcli --login -
After you verify that the new admin account works. you can delete the temporary kubeadmin account:
oc delete secrets kubeadmin -n kube-system -
Now you can point your browser to the url listed at the completion of install: i.e.
https://console-openshift-console.apps.okd4-snc.dev.my.awesome.lablabcli --consoleLog in as
adminwith the password from the output at the completion of the install.
That’s it! You now have a single node OpenShift cluster.