Quarkus for Architects who Sometimes Write Code - Being Persistent - Part 02
Note: This is part two of a three part post. In this post we’ll use Postman to interact with the Cassandra instance that we created in the first post.
Make sure you have completed part 1 - Quarkus for Architects who Sometimes Write Code - Being Persistent - Part 01
In the next post, we’ll finally get around to writing a Quarkus app. But today, we are going to use the Stargate Document API to get a feel for what the interaction will be like when we write a Quarkus app.
Make sure your OpenShift cluster is running
Note: If your OpenShift cluster that you installed the K8ssandra operator into is not running, start it now:
From a terminal run:
crc start
This will take a few minutes to restart, but you can go ahead and get Postman set up in the mean time. Leave this terminal window open so you can see the progress.
Configure Postman
I have created a Postman collection for you to use in this exercise. If you don’t have postman, now is a good time to go get it: https://www.postman.com/downloads/
-
Once you have Postman installed, go ahead and start it.
-
Now, we’re going to import a Postman collection and an environment.
Postman collections allow you to create and save API calls and tests. An environment allows you to store variable configurations for the API calls and tests. There’s a lot more to it than that, but that’s what we’re going to need for this exercise.
-
From the main Postman screen, click on the
Importbutton that is in the top left portion of the screen: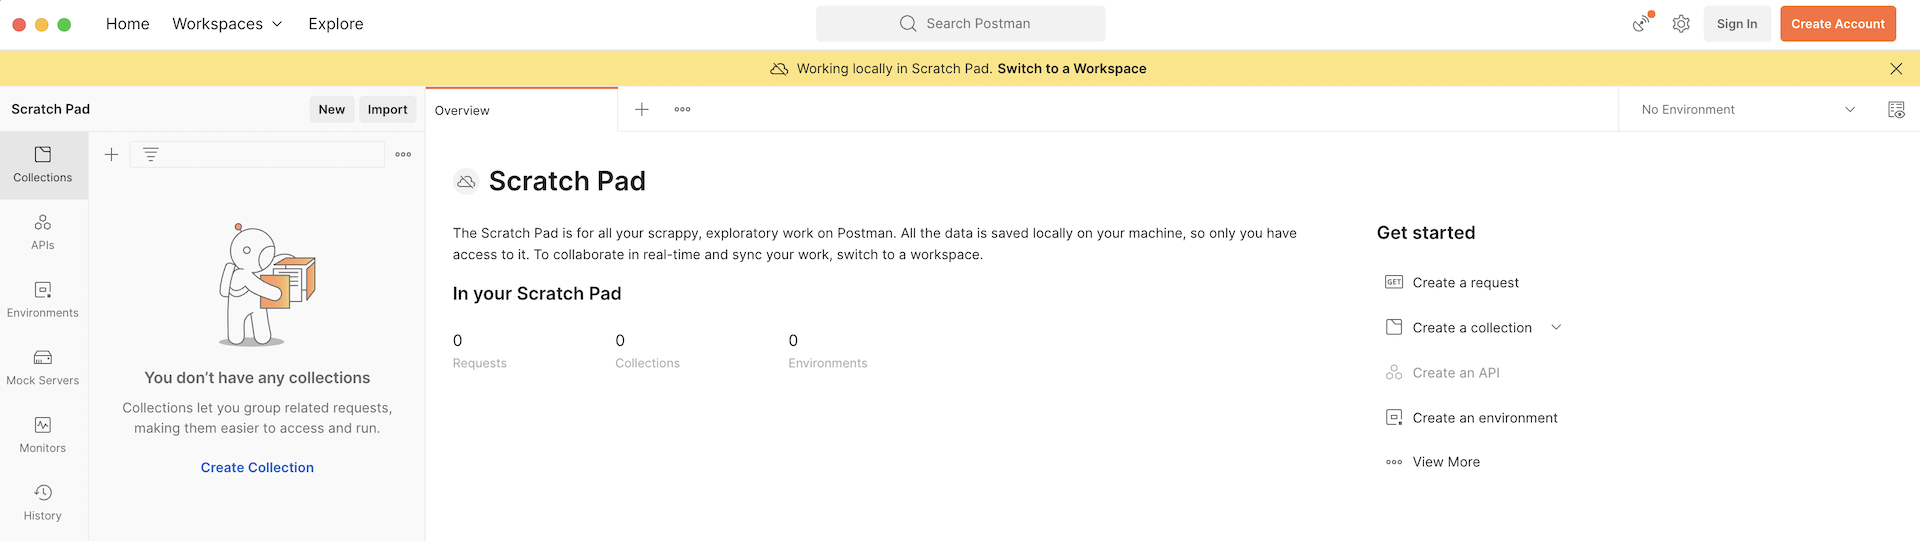
-
You should now see the Import dialog. Select the
Linkoption from the list at the top of the Import window.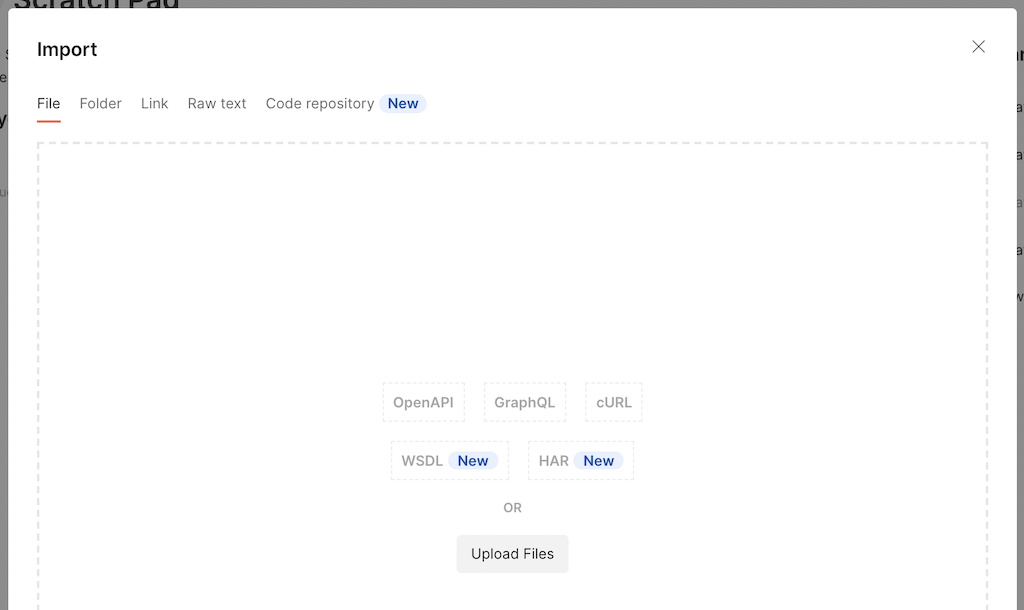
-
Past the following URL into the text box under
Enter a URL, then clickContinue:https://raw.githubusercontent.com/cgruver/k8ssandra-blog-resources/main/postman/book-catalog-01.postman_collection.json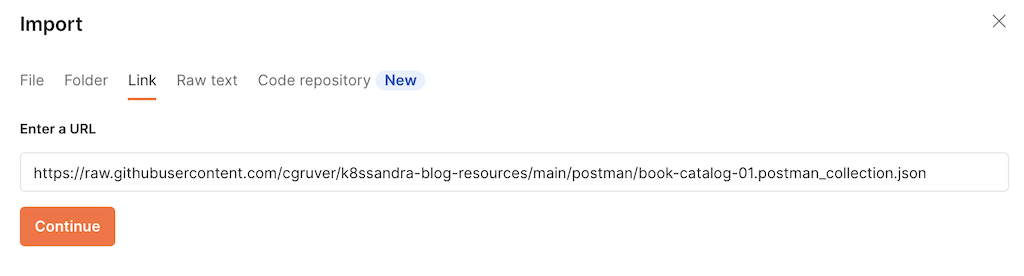
-
Click
Importto import the collection: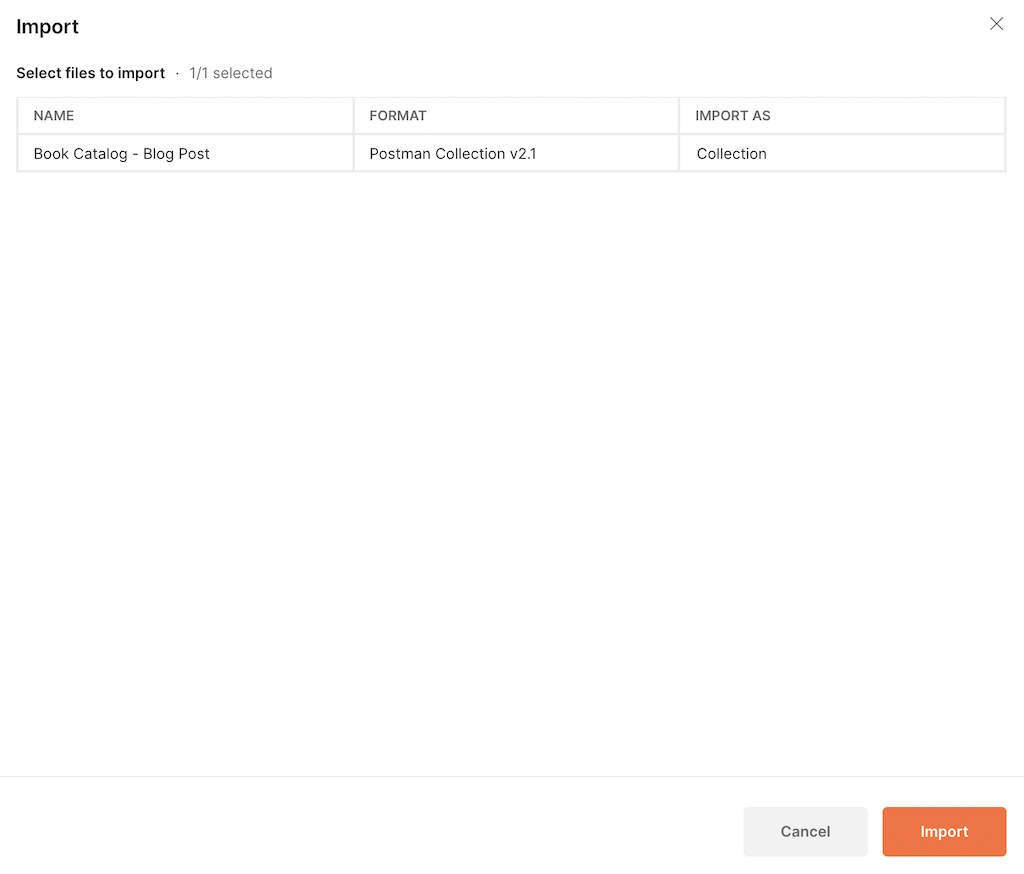
-
Repeat the above steps with the following URL to also import the Envrionment that I prepared for you:
https://raw.githubusercontent.com/cgruver/k8ssandra-blog-resources/main/postman/book-catalog-01.postman_environment.json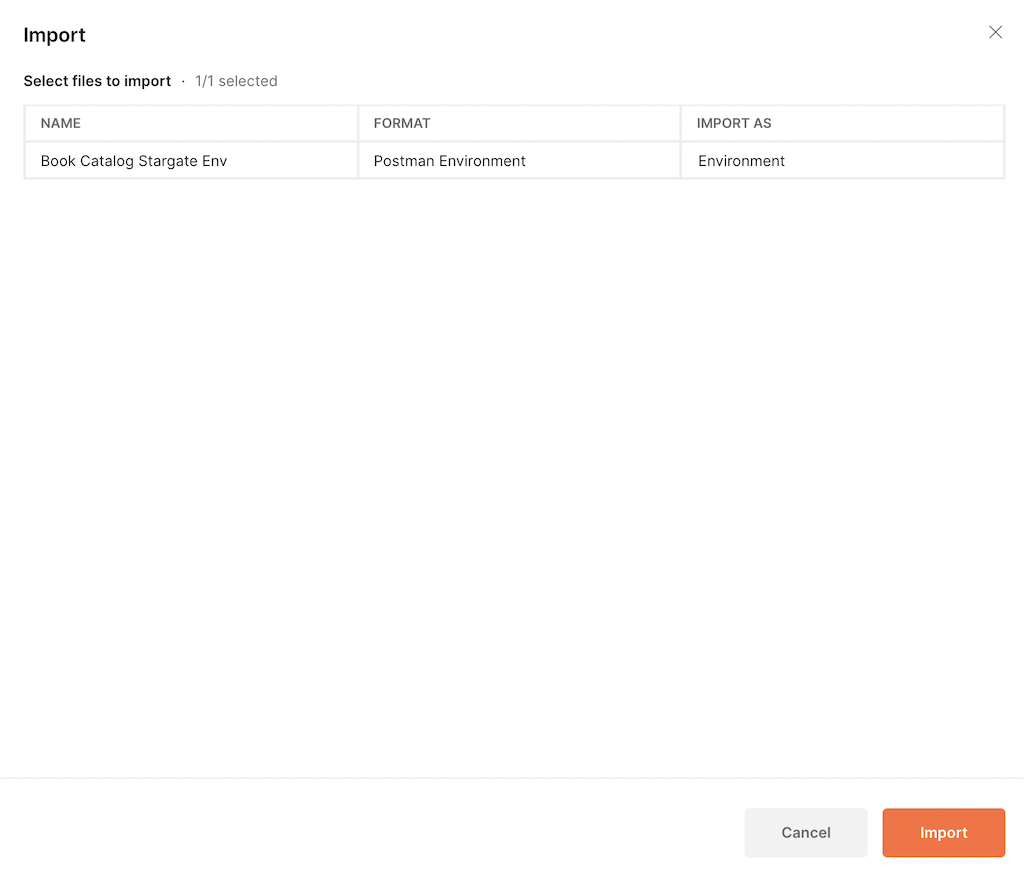
-
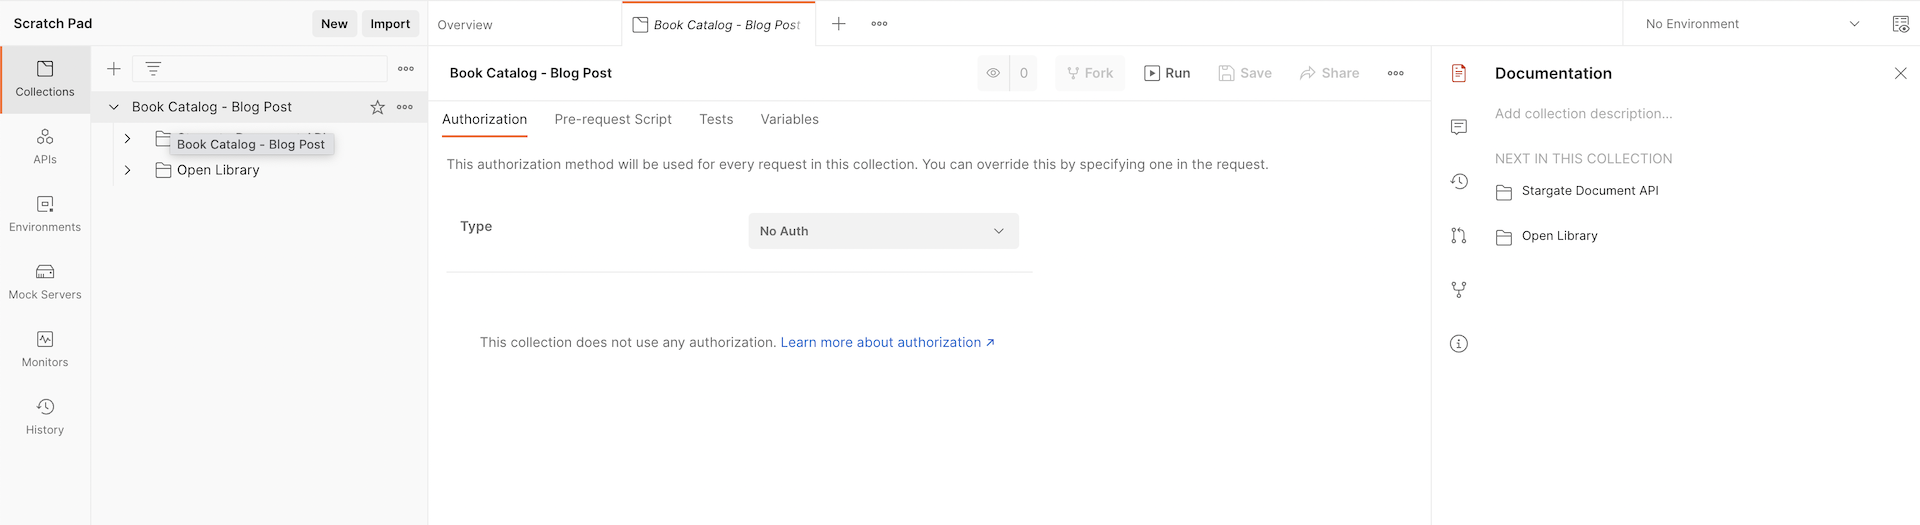
Take some time to explore the collection and environment. You can access them via the left-hand vertical nav bar.
Add Credentials to Environment and Activate the Environment
-
Next, we need credentials to access Cassandra. We’re going to bypass creating additional users in Cassandra for this exercise and just use the super-user account that was automatically generated for us.
The auto-generated credentials are stored in a
secretthat is in thek8ssandra-operatornamespace. To retrieve it, first log into yourcrcOpenShift instance:-
Open a terminal and set the
crcenvironment:~ % eval $(crc oc-env) -
Retireve the login command and credentials:
~ % crc console --credentialsYou should see output similar to:
To login as a regular user, run 'oc login -u developer -p developer https://api.crc.testing:6443'. To login as an admin, run 'oc login -u kubeadmin -p 3QxJ6-P5Z2c-DD7as-zfmfI https://api.crc.testing:6443' -
Copy the command to login as
kubeadminand run it:~ % oc login -u kubeadmin -p 3QxJ6-P5Z2c-DD7as-zfmfI https://api.crc.testing:6443You should see output similar to:
Login successful. You have access to 68 projects, the list has been suppressed. You can list all projects with 'oc projects' Using project "default". -
Now grab the contents of the secret created for the Cassandra credentials:
echo $(oc -n k8ssandra-operator get secret k8ssandra-cluster-superuser -o jsonpath="{.data.password}" | base64 -d)Copy the resulting string into your clipboard. We’re going to add it to our Postman environment.
-
-
Add the cassandra super-user password to the Postman Environment:
Note: I know I don’t have to say this… but I’m going to anyway… You should NEVER put production credentials into your Postman environment. This is a development tool. While the values that we’re going to be using are not persisted, it’s still sitting there on your machine in plain text for the duration of your session.
OK, with that disclaimer out of the way, go ahead and open the Environment that I prepared for you:
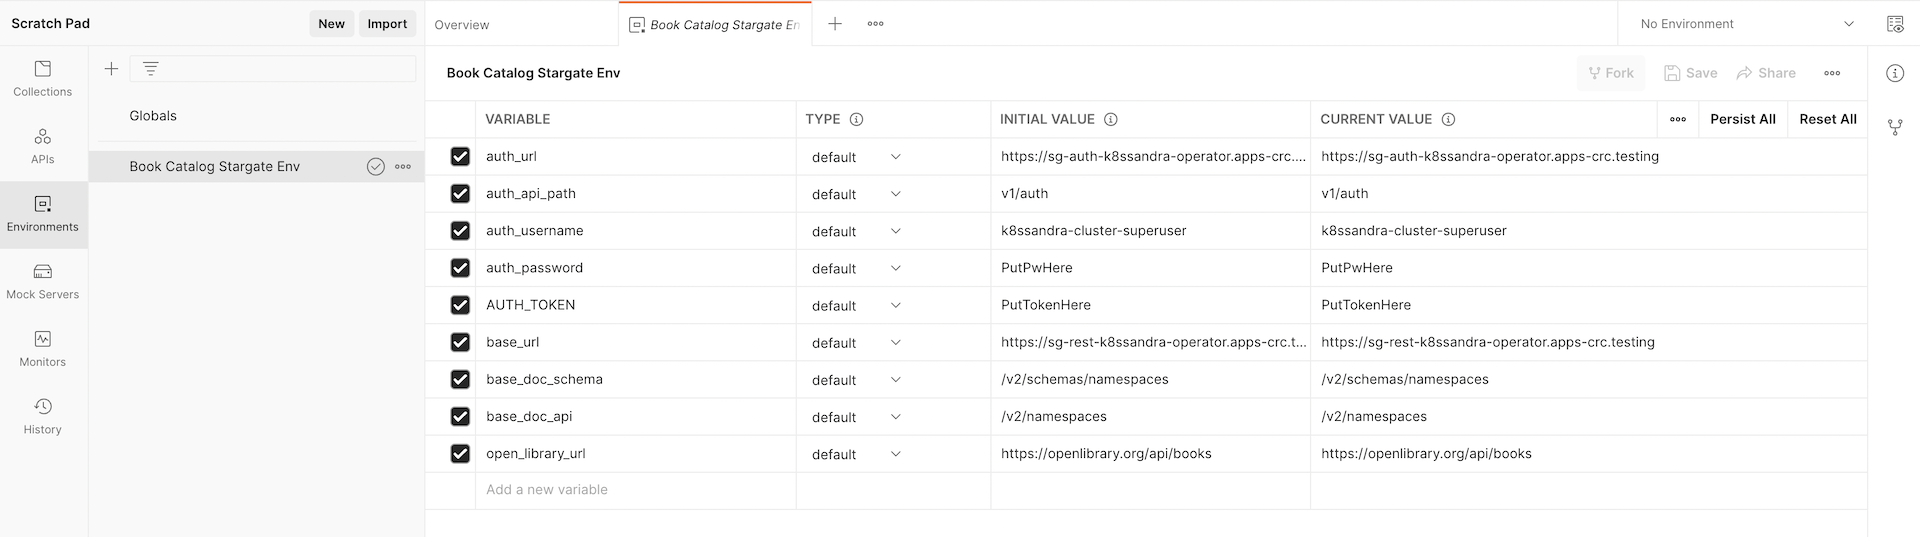
Note that there are two columns of values for each key. The left column of values, called
INITIAL VALUE, is persisted as part of the collection. Never put anything sensitive there. It will be saved in plain-text. The right hand column of values, calledCURRENT_VALUE, is ephemeral. It lasts as long as your postman session, and can be dynamically changed by your Postman tests or scripts. We’ll see an example of that with the value forAUTH_TOKENtoken. I still wouldn’t put anything sensitive here, but that’s up to you. :-)Now, paste the value for the k8ssandra-cluster-superuser password in the row named
auth_password. Paste it into theCURRENT VALUEcolumn.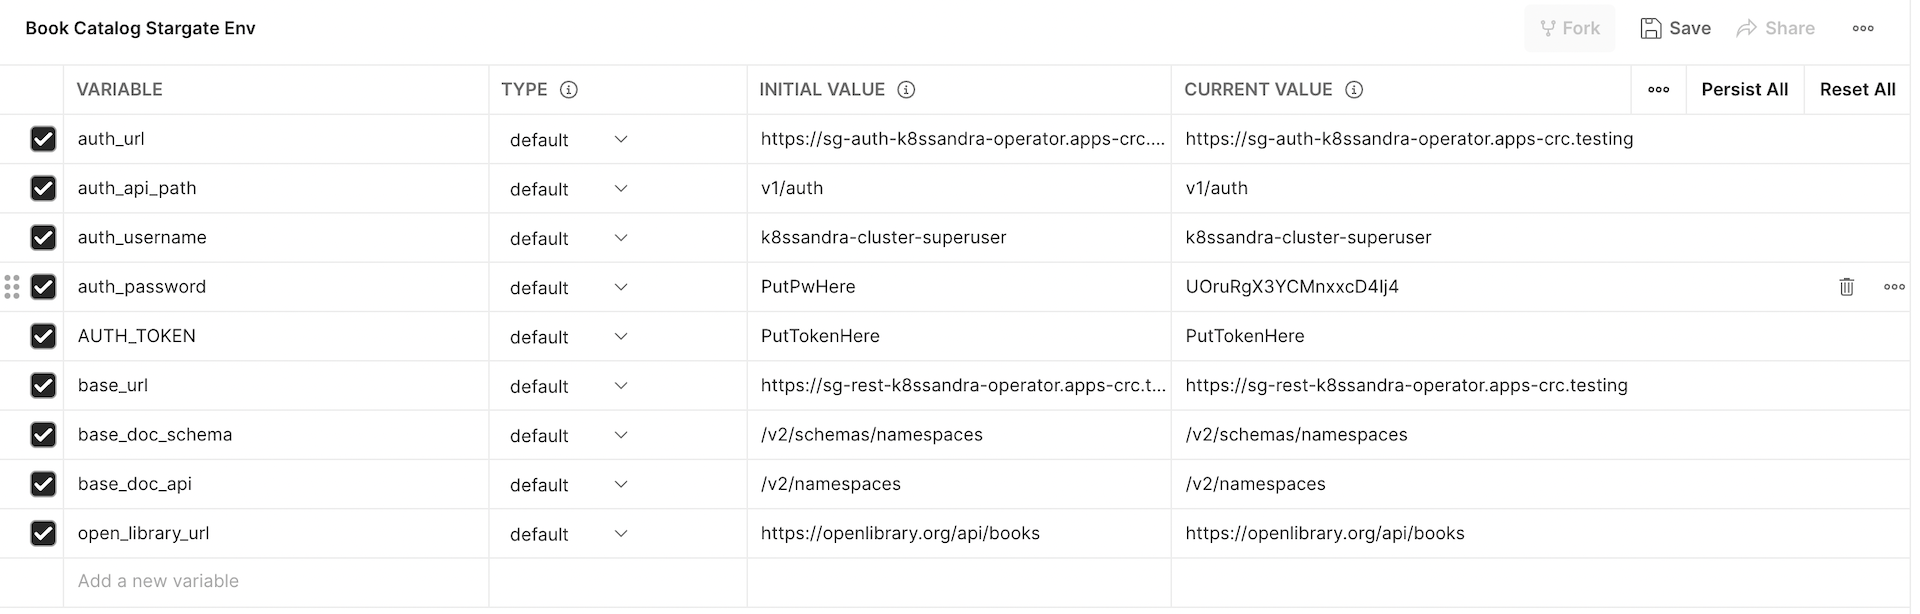
-
Finally, activate the environment for this session by selecting
Book Catalog Stargate Envfrom the environment drop down in the top right had corner of Postman: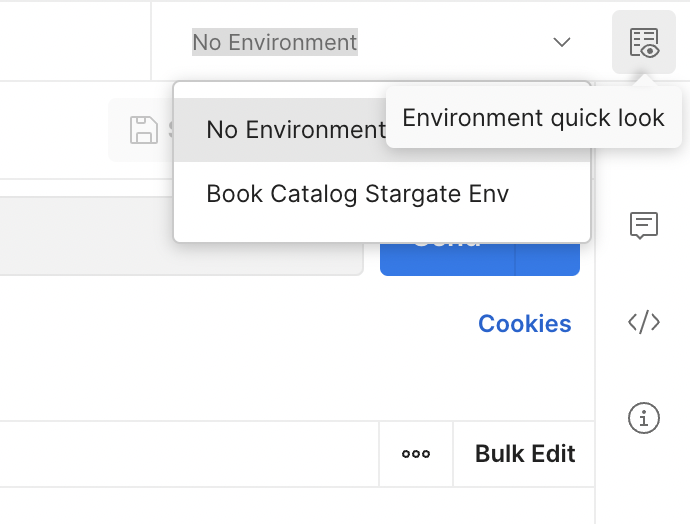
Use Postman To Interact with Cassandra via the Stargate Document API
Now let’s use Postman to put some data into our new Cassandra cluster, and query it.
Expand the list of prepared calls in the Book Catalog - Blog Post collection:
-
Select the
Collectionsbutton at the top left of the Postman window. -
Expand the
Book Catalog - Blog Postcollection. -
Expand the
Stargate Document APIfolder.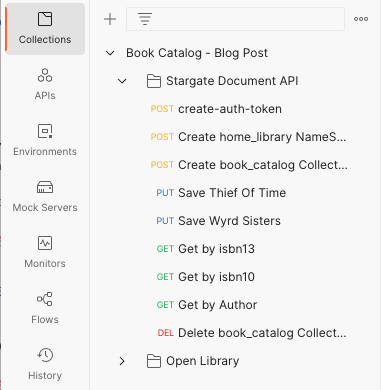
We’re going to pretty much hit these API invocations from the top down.
The results will be:
-
Create an Authentication Token and store it in the Postman environment
-
Create a Document Namespace
-
Create a Collection to hold Documents
-
Add information about 2 books to the Collection as Documents
-
Search for a book information document by ISBN10 and ISBN13
We’ll see that we get back one document that matches the search.
-
Search for book information by Author
We’ll see that we get back a list of documents.
-
Delete the Collection, so we don’t leave garbage sitting around.
Now, let’s dive in:
Put Some Data in Cassandra
-
The first step is to authenticate with Cassandra and get a Token:
Select
create-auth-tokenand clickSend: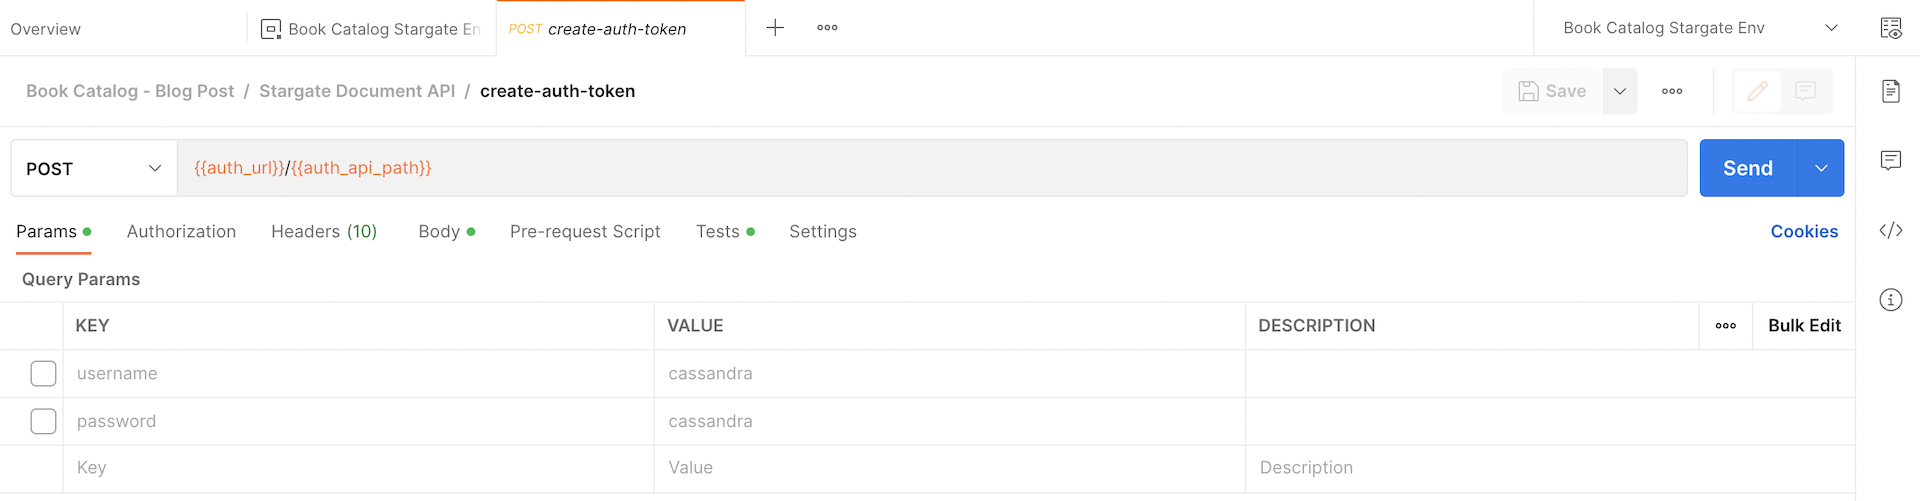
Note: You will likely see a failure. Click on
Disable SSL Verification. Your OpenShift Local instance is using a self-signed cert, and Postman does not pick up certs from your local keystore. It has its own. You can add the cert to Postman’s local store if you like, but thecrccert will change every time you destroy it and create a new cluster.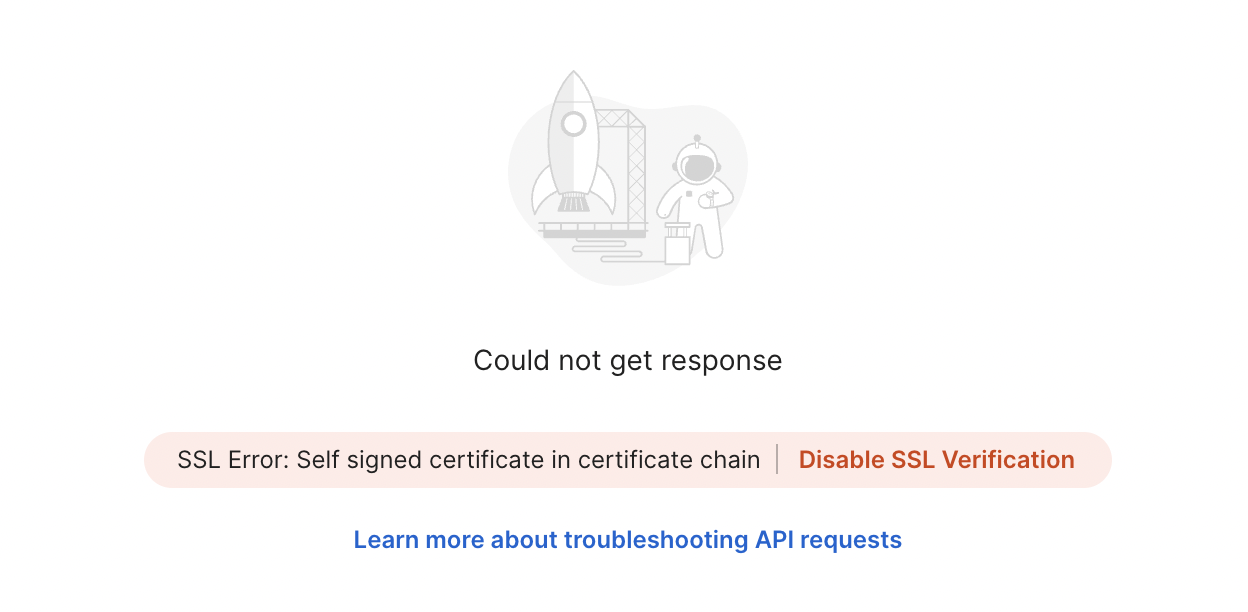
Now, click
Sendagain, and you should see anauthTokenreturned:
-
Take a moment to click over to the
Book Catalog Stargate Envenvironment, and notice that theauthTokenhas been stored in theCURRENT VALUEcolumn for theAUTH_TOKENkey: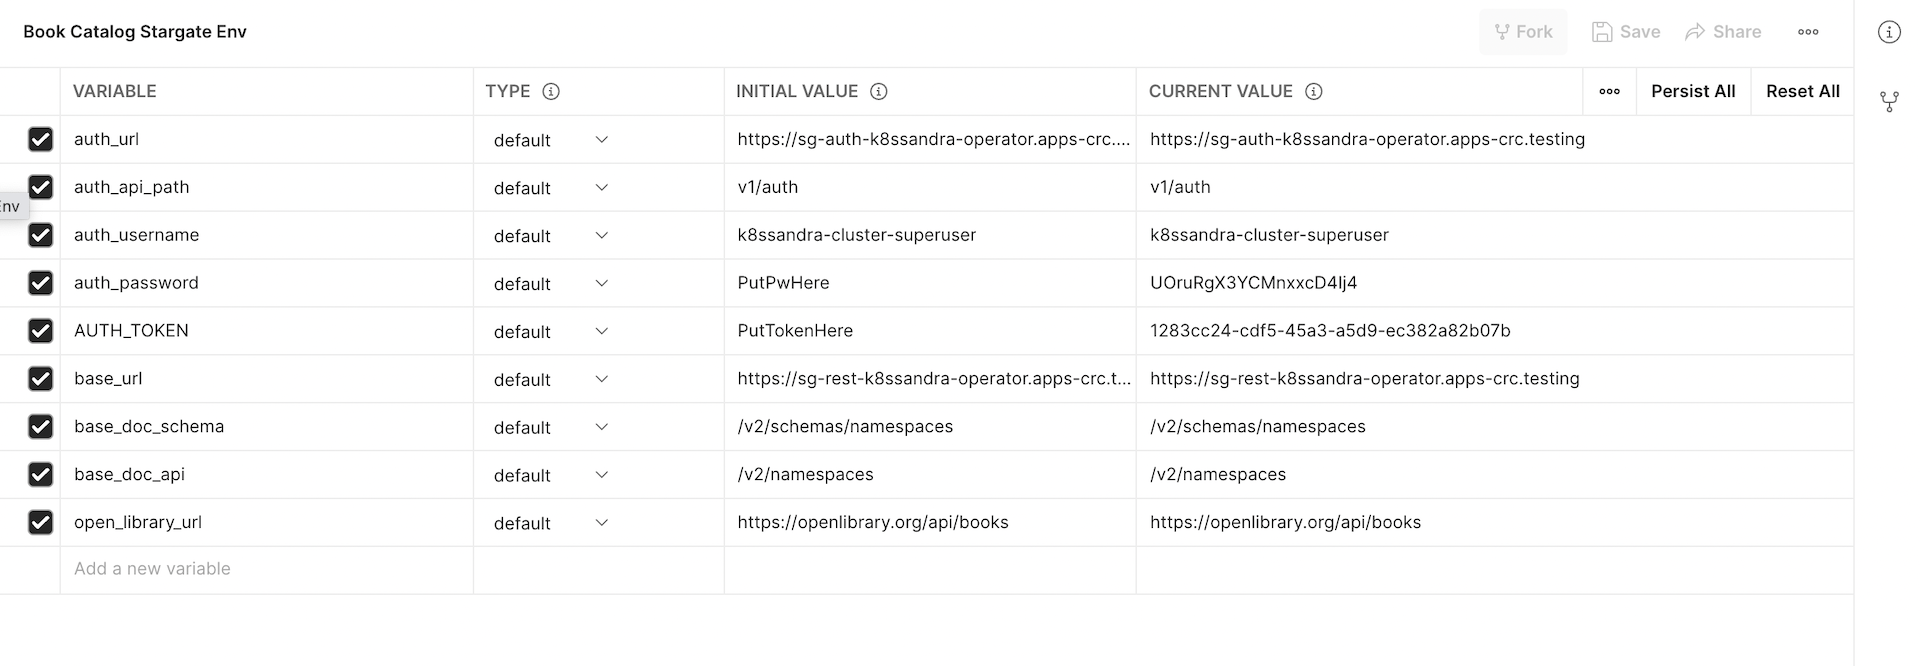
-
Now, go back and select
Create home_library NameSpacefrom the collectionClick
Sendand notice the successful creation of your NameSpace:Note: You can see the payload submitted in
POSTorPUTcalls by clicking onbodyright under the URL. You can toggle through those tabs to seeParams,Headers, etc…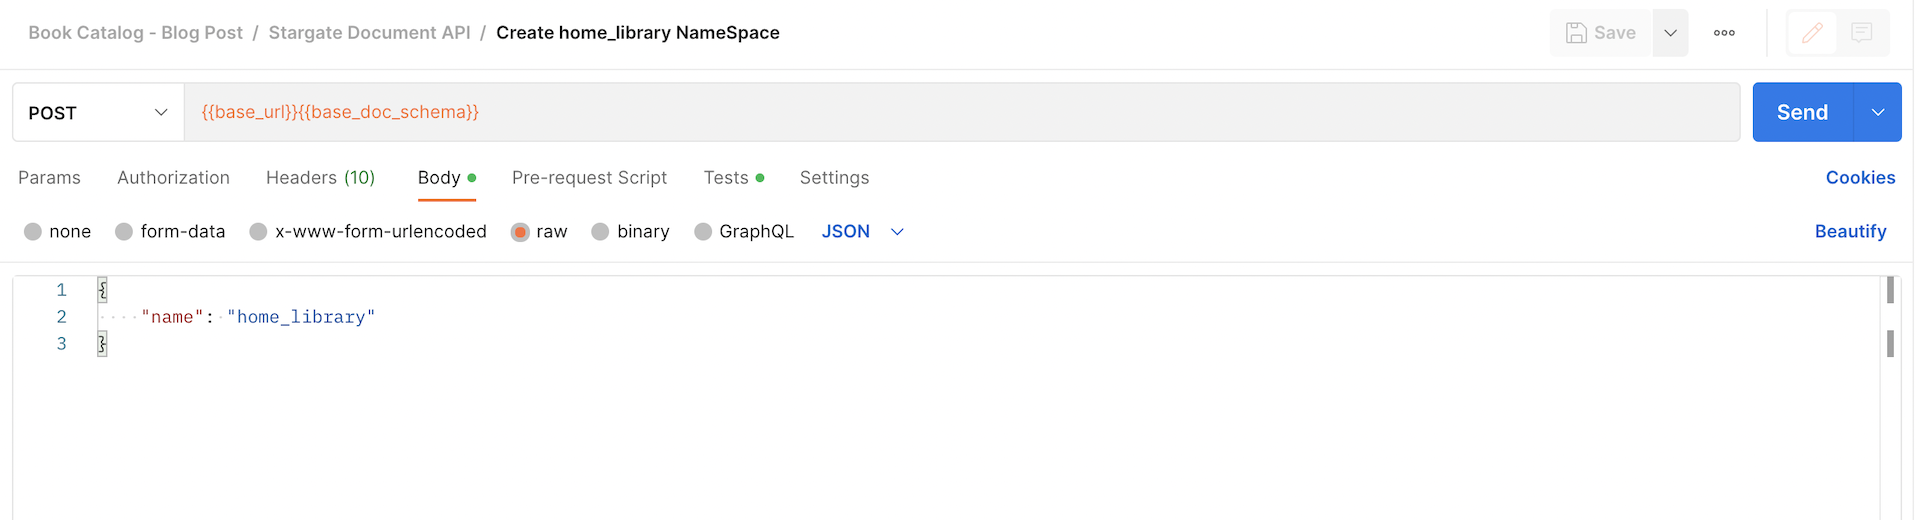
The response for this call will be an empty
201if it is successful. -
Repeat with the
Create book_catalog Collection: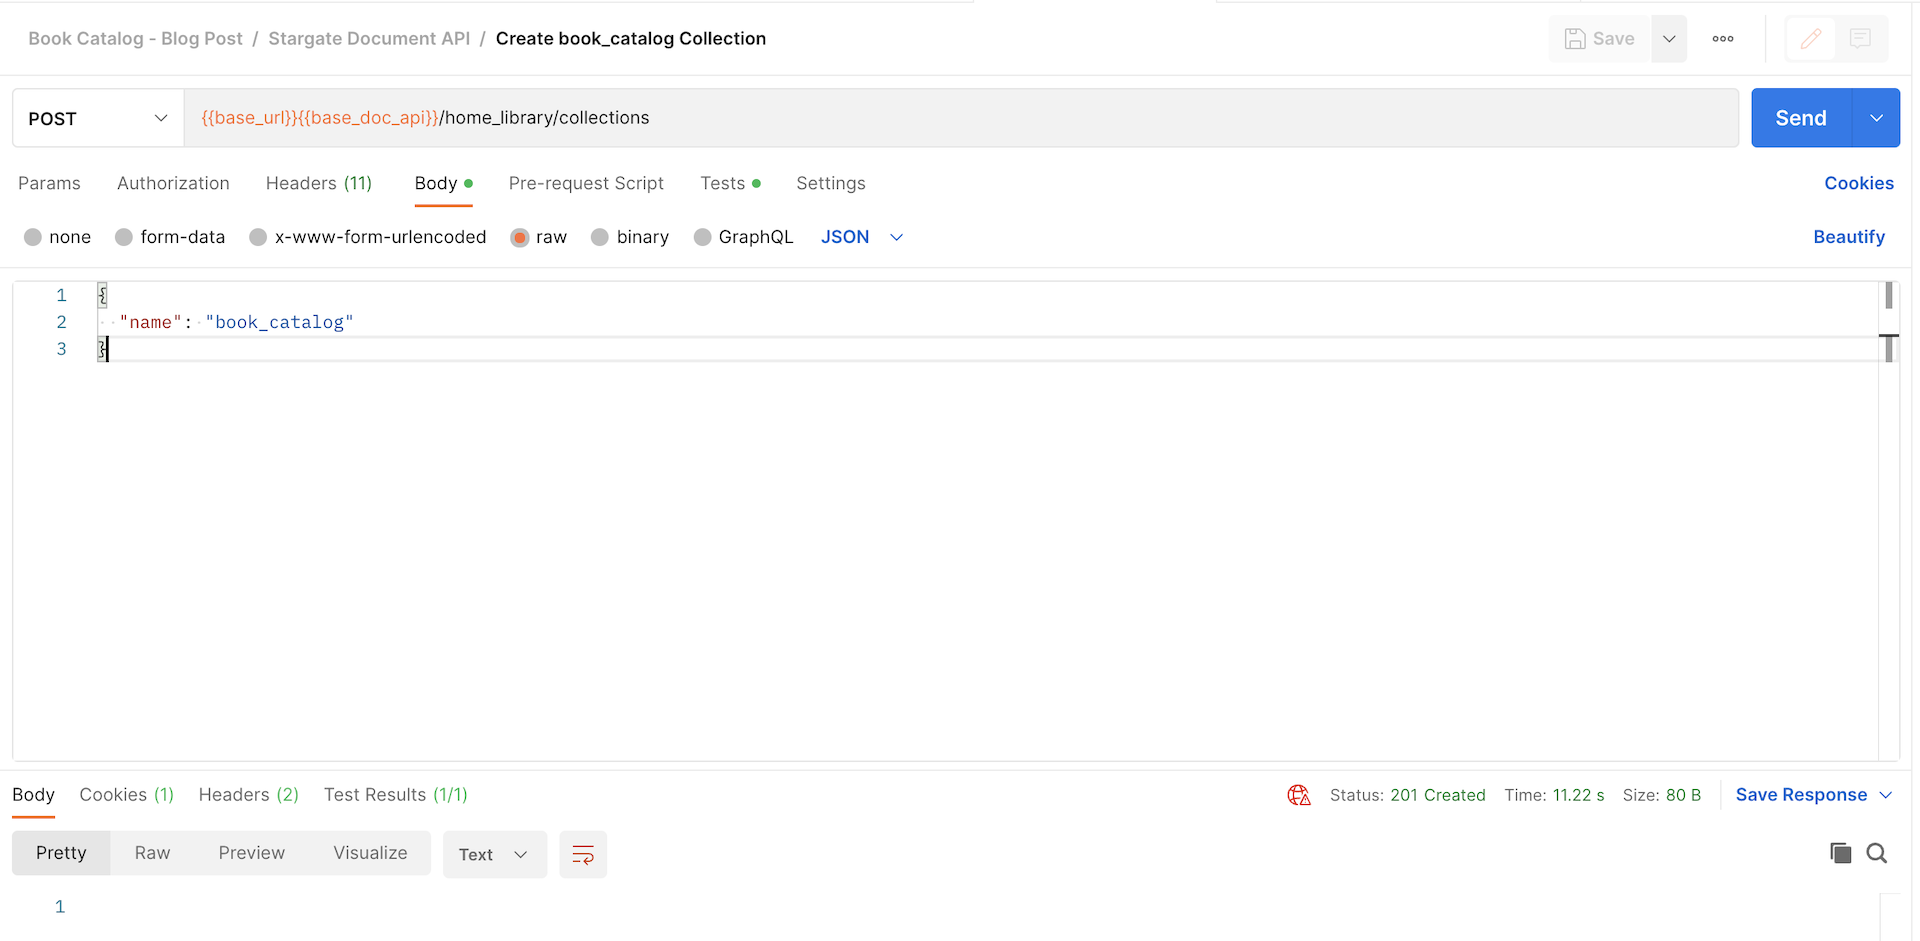
-
Now that we have a collection in a namespace, let’s add some data:
Select
Save Thief Of Timeand clickSend: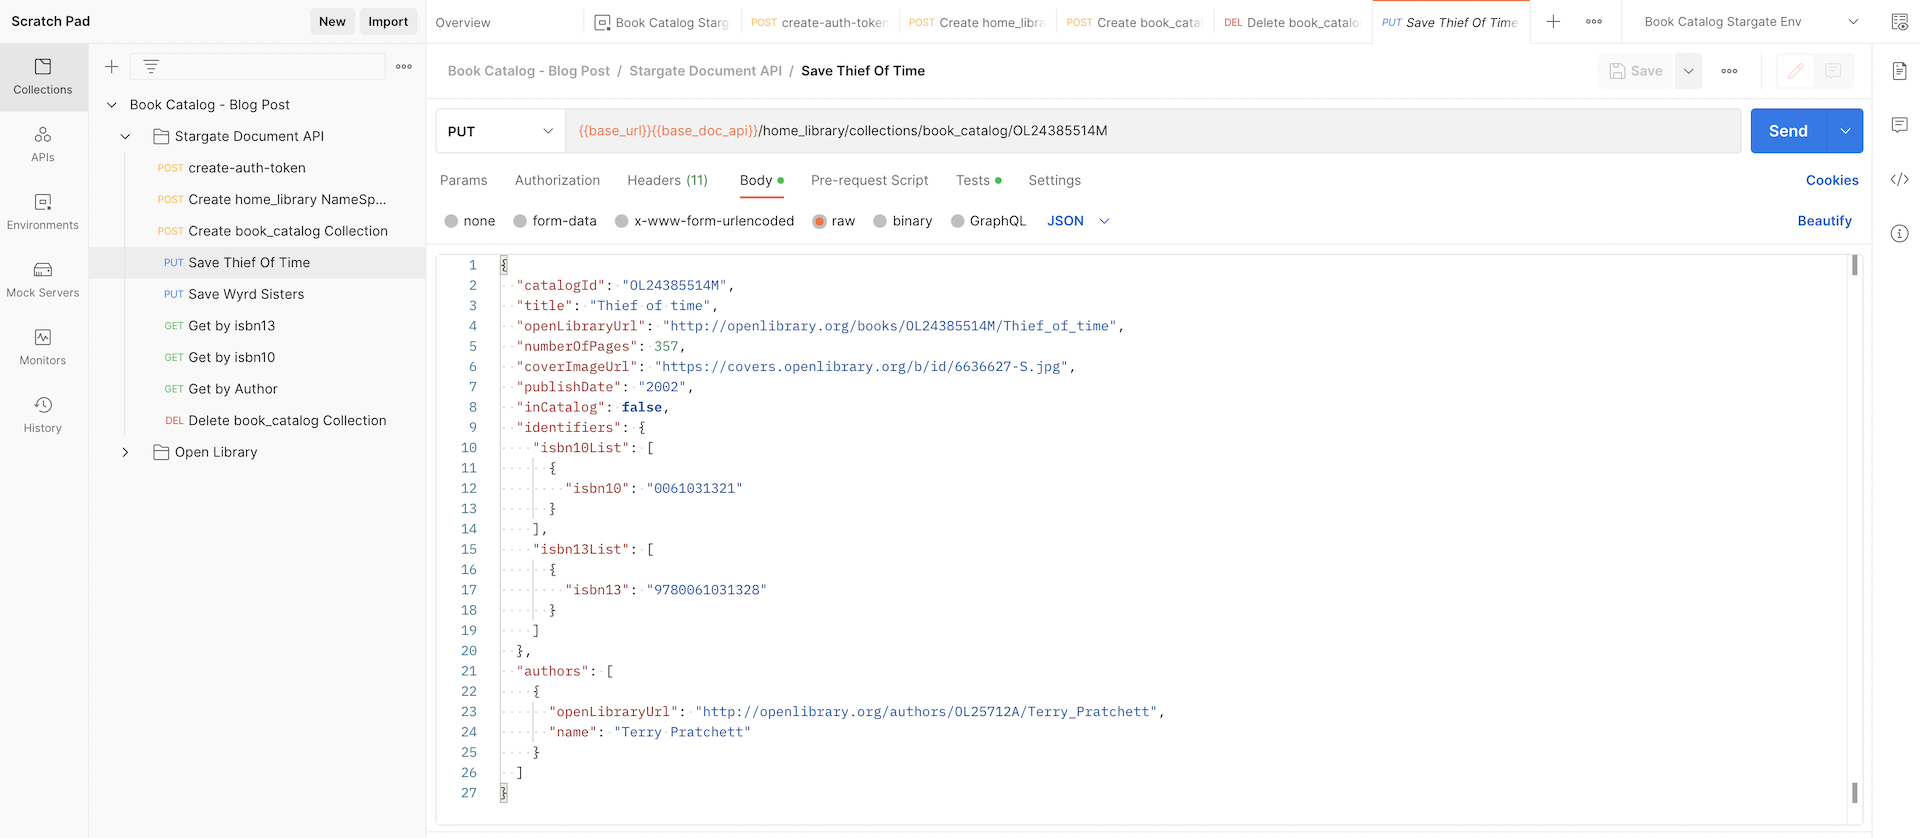
Take a look at the
bodyof the request. It represents a Book Info document. We’ll turn this into code when we build the Quarkus app.Note also that we are using the
PUTverb. If we usePOSTcassandra will assign the document id for us as a UUID. UsingPUTallows us to create our own ID.PUTcan also be used to update an existing document. -
Add the second book info document by selecting
Save Wyrd Sistersand clickSend: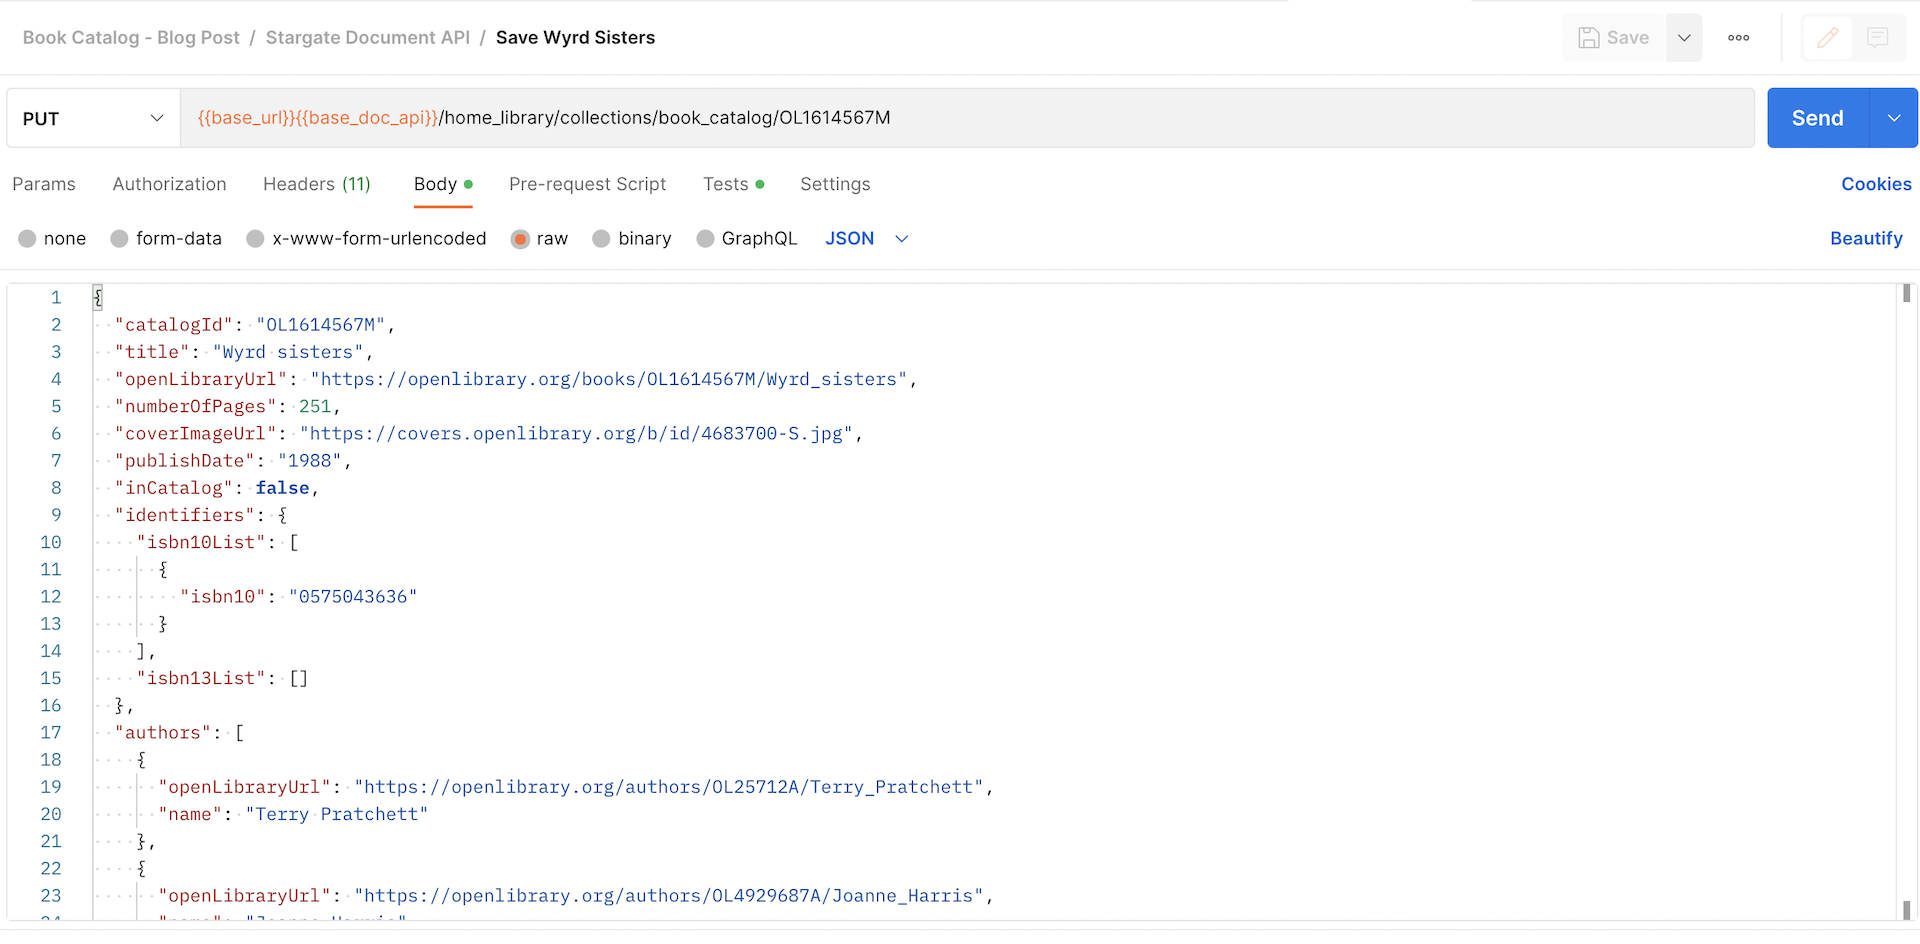
At this point we have inserted two documents into our collection. Behind the scenes, Stargate has interacted with Cassandra to persist this data and perform some optimizations on it for query.
This is really where the power of Stargate is going to come into play. As a developer, we are going to be abstracted away from the nuances of Cassandra data modeling and optimization. I’m fairly new to this, so I’m sure there are plenty of tradeoffs, but the simplicity can’t be beat.
So, let’s query our data!
Query The Data That We Persisted
Note: At some point your AUTH TOKEN may expire. If you get an authentication failure, just hit Send on the create-auth-token call in the collection. This will refresh your token.
-
Select
Get by isbn13from the collection: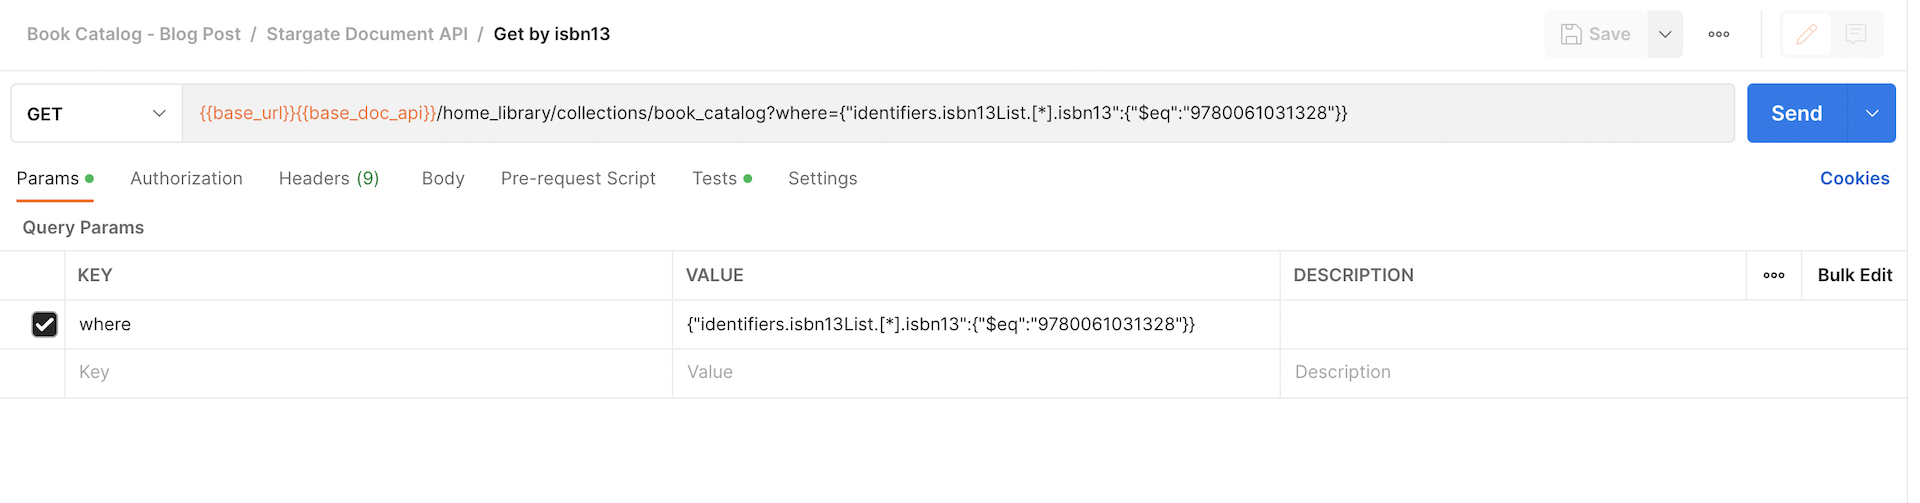
Take a look at the URL. Note the query parameter:
where={"identifiers.isbn13List.[*].isbn13":{"$eq":"9780061031328"}}This is Stargate Document API specific syntax.
Note that the value of the
wherekey is JSON.The key of the JSON object is a JSON path.
The value of the JSON object is an instruction to use an equals method with the value of
9780061031328against the data at the end of the JSON path.This should return to us any document that has the object
{"isbn13":"9780061031328"}in itsisbn13Listarray. -
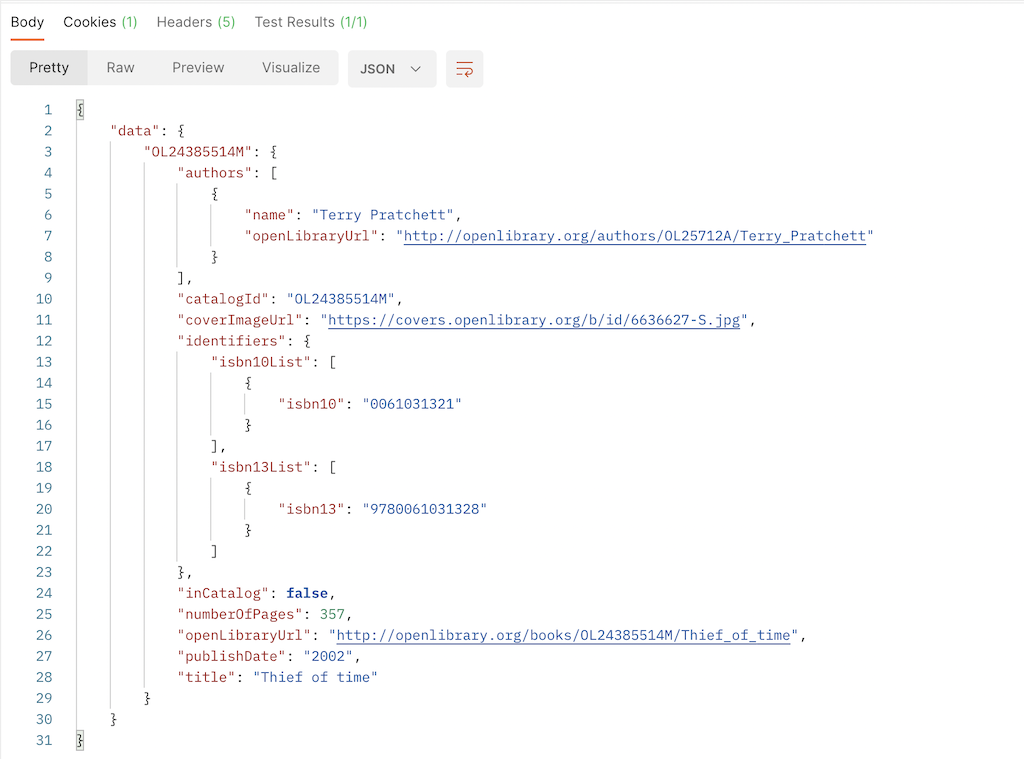
Click
Send:Notice that the document for the book “Thief Of Time” is returned
-
Select
Get by isbn10from the collection and clickSend:Notice that once again, the document for the book “Thief Of Time” is returned
-
Select
Get by Authorfrom the collection and hitSend:Notice that you get both documents returned since Terry Pratchett is included as an author on both book info documents.
-
Now, go play. Change the queries, add more book info documents.
As a start, replace “Terry Pratchett” with “Joanne Harris” in the
Get by Authorcall and hitSendagain.This time you should just see the data for “Wyrd Sisters” returned.
When you are done, select Delete book_catalog Collection from the collection and hit Send. This will delete the data from Cassandra.
That’s it!
Next time we’ll turn this into a Quarkus app that will retrieve data from the Open Library API, and store it in our Cassandra cluster using the Stargate Document API.
Check out Open Library here: https://openlibrary.org
Cheers!